Soil pH is the single most important soil parameter you can test — it controls nutrient availability, microbial activity, and ultimately your crop yield. The ideal soil pH for most Indian crops is 6.5 to 7.5. Outside this range, even expensive fertilizers like DAP and Urea become partially or fully unavailable to plants — meaning you pay for inputs that your crop cannot absorb.
This guide covers 5 methods to test soil pH at home or at low cost, how to read and interpret results, which crops grow best at each pH level, and how to correct acidic or alkaline soil using locally available amendments.
Why does soil pH matter for crop yield?
Soil pH affects every nutrient your crop needs. At the wrong pH, nutrients get chemically locked in the soil and become unavailable to plant roots — no matter how much fertilizer you apply. This is why some farmers report poor yield even after heavy fertilizer use: the problem is pH, not fertilizer quantity.
| Nutrient | Available at pH 6.0-7.0 | Locked at Low pH (<5.5) | Locked at High pH (>8.0) |
| Nitrogen (N) | Maximum availability | Reduced — nitrate leaches | Moderate reduction |
| Phosphorus (P) | Maximum — DAP most effective | Locked by iron/aluminium | Locked by calcium — DAP wasted |
| Potassium (K) | Good availability | Moderate reduction | Good but leaching risk |
| Zinc (Zn) | Adequate | High — toxicity risk | Severely locked — deficiency common |
| Iron (Fe) | Adequate | High — toxicity risk in flooded soil | Severely locked — chlorosis |
Practical example: If your soil pH is 8.2 (alkaline black cotton soil in Vidarbha) and you apply DAP at full dose, up to 60% of the phosphorus gets locked by calcium — you are wasting money on fertilizer your crop cannot use. Correcting pH to 7.0 first makes the same DAP dose 40 to 60% more effective.
What is the ideal soil pH for Indian crops?
| pH Range | Soil Type | Crops That Grow Well | Common in India |
| Below 5.5 | Strongly acidic | Tea, coffee, blueberry — most crops fail | Northeast India, hill regions |
| 5.5 to 6.5 | Slightly acidic | Potato, maize, tomato, groundnut, soybean | Red soils of Deccan, Eastern India |
| 6.5 to 7.5 | Neutral (ideal) | Wheat, rice, onion, most vegetables | Alluvial soils — Punjab, UP, Maharashtra |
| 7.5 to 8.5 | Slightly alkaline | Barley, sugarbeet, cotton — limited options | Black cotton soil — Vidarbha, Gujarat |
| Above 8.5 | Strongly alkaline | Almost no crop grows well — saline/sodic | Usar land — UP, Haryana, Punjab |
Maharashtra-specific: Red laterite soils of Konkan tend to be acidic (5.5 to 6.5). Black cotton soils of Vidarbha and Marathwada are alkaline (7.5 to 8.5). Alluvial soils of Western Maharashtra are near neutral (6.5 to 7.5) — best for vegetable farming.
What are the methods to test soil pH at home?
| Method | Cost | Accuracy | Time to Result | Best For |
| pH paper / litmus strip | Rs. 30 to 80 | Low — ±1.0 | 30 seconds | Quick farm check |
| Digital pH meter | Rs. 300 to 1,500 | High — ±0.1 | 2 minutes | Regular farm monitoring |
| Soil pH kit (chemical) | Rs. 150 to 400 | Medium — ±0.5 | 5 minutes | Multi-plot testing |
| Soil Health Card (Govt lab) | Free | Very high — ±0.05 | 2 to 4 weeks | Comprehensive soil analysis |
| ICAR / KVK lab test | Rs. 100 to 300 | Very high | 3 to 7 days | Research-grade accuracy |
Method 1 — pH paper strips (cheapest)
- Available at agriculture input shops, pharmacies, and online (Rs. 30 to 80 for a pack of 100 strips)
- Mix 1 part soil with 2 parts distilled water — stir and let settle for 5 minutes
- Dip strip into the clear water above settled soil — compare colour change to chart on packet
- Accuracy is limited (±1.0) but useful for quick field check to identify severely acidic or alkaline soils
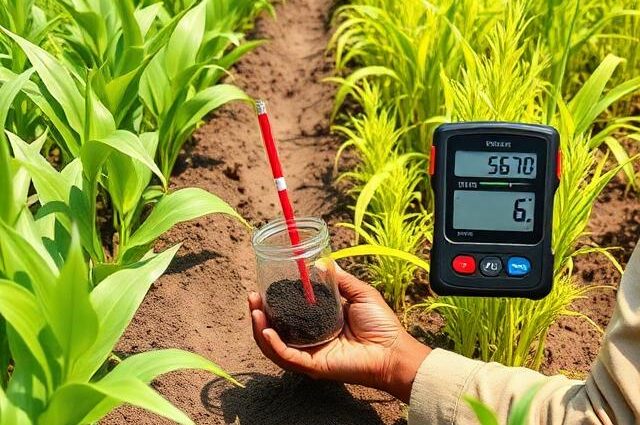
Method 2 — Digital pH meter (most recommended for farmers)
- Cost: Rs. 300 to 1,500 — available on Amazon, Flipkart, or at agriculture equipment shops
- Recommended models: Dr. Meter PH100, Apera PH20, or any branded meter with ±0.1 accuracy
- Collect soil sample from 15 cm depth — remove stones and debris
- Mix 10 grams of soil with 20 ml distilled water in a clean glass — stir for 2 minutes
- Let mixture settle for 5 to 10 minutes
- Calibrate the pH meter using buffer solution (pH 7.0) — this step is critical for accuracy
- Insert probe into the clear water above settled soil — wait for reading to stabilise
- Record reading — rinse probe with distilled water after every sample
Calibrate your pH meter before every testing session — uncalibrated meters drift by 0.3 to 0.5 pH units over time, leading to wrong decisions on lime or gypsum application.
Method 3 — Soil pH test kit (chemical indicator)
- Available at Krishi Seva Kendra shops — Rs. 150 to 400 for a kit testing 50 to 100 samples
- Add soil to test tube, add indicator solution, shake and compare colour to reference chart
- Useful for farmers who want to test multiple plots across their farm — faster than digital meter for bulk testing
Method 4 — Soil Health Card (free, most comprehensive)
- Apply at your nearest Krishi Vigyan Kendra (KVK) or Primary Agriculture Cooperative Society (PACS)
- Soil Health Card tests 12 parameters: pH, EC, organic carbon, N, P, K, S, Zn, Fe, Cu, Mn, B
- Results available in 2 to 4 weeks — card shows current status and recommended inputs for your specific soil
- Free of cost for all farmers — apply once every 2 years as per government recommendation
How to collect a soil sample correctly for pH testing?
Wrong sampling is the most common reason for inaccurate results — a sample from the wrong depth or location gives misleading pH data.
- Choose 5 to 10 random spots across your field — avoid sampling near field boundaries, manure pits, or irrigation channels
- Remove 2 to 3 cm of surface soil and debris from each spot
- Dig to 15 cm depth using a clean spade or soil auger — collect soil from this depth
- Mix all spot samples together in a clean plastic bucket — this is your composite sample
- Take 200 to 500 grams from the mixed sample — this goes for testing
- Label the sample with: field name, crop grown last season, irrigation source
- Air-dry the sample in shade for 24 hours before testing — wet soil gives slightly different pH readings
Test soil separately for different fields or plots — mixing samples from different soil types gives an average that is useless for management decisions. One composite sample per distinct field or soil type.
How to correct soil pH — acidic and alkaline soil treatment
pH correction must be done before sowing — amendments need 2 to 6 weeks to react with soil and change pH. Do not apply lime or gypsum and sow the next day.
| Problem | Amendment | Dose per Acre | Application Method |
| Soil too acidic (pH below 6.0) | Agricultural lime (CaCO3) | 400 to 800 kg | Broadcast and plough in 3 to 4 weeks before sowing |
| Soil too acidic (pH below 6.0) | Dolomite lime | 300 to 600 kg | Better than CaCO3 — also adds Mg; incorporate before sowing |
| Soil too alkaline (pH above 8.0) | Gypsum (CaSO4) | 400 to 600 kg | Broadcast, irrigate, wait 2 to 3 weeks before sowing |
| Soil too alkaline (pH above 8.0) | Sulphur (elemental) | 100 to 200 kg | Mix in soil 4 to 6 weeks before sowing — slow acting |
| Saline-sodic (pH above 8.5 + high EC) | Gypsum + organic matter | 800 to 1200 kg gypsum | Requires multiple seasons — consult KVK for reclamation plan |
Important rules for pH correction
- Never apply lime and DAP together — lime raises soil calcium which immediately locks phosphorus. Apply lime first, wait 3 weeks, then apply DAP
- Do not over-lime — raising pH too fast above 7.5 causes Zinc and Manganese deficiency. Aim to raise by 0.5 units per season
- Organic matter helps buffer pH — adding FYM or vermicompost at 5 to 8 tonnes per acre improves pH stability over time
- Retest pH after every amendment application — pH changes are gradual and you need data to decide on the next dose
- For saline-sodic soils (usar land) above pH 8.5: Do not attempt correction without guidance from your district KVK — these soils require a multi-year reclamation programme
Quick DIY pH test using vinegar and baking soda
If you need a very rough idea of whether your soil is acidic or alkaline — with no equipment needed:
Vinegar test for alkaline soil
- Take 2 tablespoons of dry soil in a bowl
- Add half cup of white vinegar (dilute acetic acid)
- If it fizzes or bubbles — soil is alkaline (pH above 7.5). The reaction is lime in soil reacting with acid
- No reaction — soil is neutral or acidic
Baking soda test for acidic soil
- Take 2 tablespoons of dry soil in a bowl
- Add half cup of water — mix to a paste
- Add half teaspoon of baking soda
- If it fizzes — soil is acidic (pH below 6.5)
- No reaction — soil is neutral or alkaline
This DIY test is only directional — it tells you acidic vs alkaline, not the actual pH number. Use a digital meter or Soil Health Card before making any amendment decisions that cost money.
Summary
Soil pH is the foundation of all other soil management decisions — fertilizer dose, crop selection, amendment requirements, and even irrigation planning. Testing pH takes less than 10 minutes with a digital meter and costs under Rs. 1,500 for a device that lasts years. The cheapest and most comprehensive option remains the government’s free Soil Health Card — apply at your nearest KVK and get 12 soil parameters tested at no cost.
Fix pH first, fertilize second — this is the most important rule in soil management that most Indian farmers skip, and it is costing them 20 to 40% of their potential yield every season.
Not sure how to interpret your Soil Health Card results or which amendment to buy locally? Drop your pH reading and district in the comments.
Frequently Asked Questions
What is the best soil pH for vegetable farming in India?
The ideal soil pH for most vegetable crops in India is 6.0 to 7.0. Within this range, all major nutrients — N, P, K, Zinc, and Boron — are at their maximum availability. Tomato, onion, brinjal, chilli, and cabbage all perform best in this slightly acidic to neutral range. If your soil is above 7.5, correct with gypsum before starting a vegetable farm — it directly impacts both yield and fertilizer efficiency.
How often should I test soil pH on my farm?
Test soil pH once every 2 years as a minimum, and always before starting a new crop on land that has not been tested before. After applying any amendment (lime, gypsum, sulphur), retest after 6 to 8 weeks to measure the actual change. Farmers applying heavy organic inputs like FYM or vermicompost annually generally see more stable pH and need less frequent testing.
My soil pH is 8.2 — which crops can I still grow?
At pH 8.2 you have limited but workable options. Crops that tolerate mild alkalinity include: barley, wheat, cotton, sugarbeet, and spinach. Before growing vegetables or pulses, apply gypsum at 400 to 600 kg per acre and retest after 6 weeks. In Maharashtra’s black cotton soil zone (Vidarbha), many farmers grow cotton and soybean successfully at pH 7.8 to 8.2 without amendment — but phosphorus efficiency is low and Zinc deficiency is common without correction.
Can I use lemon juice or vinegar to lower soil pH?
Lemon juice or household vinegar are too weak and too expensive to meaningfully change farm soil pH — the buffering capacity of soil neutralises them almost immediately. For acidic correction of alkaline soil, use agricultural-grade elemental sulphur (100 to 200 kg per acre) or gypsum — both are cheap, widely available, and proven effective. Vinegar is useful only for the DIY directional test described above, not for amendment.
Does pH testing equipment need calibration and maintenance?
Yes — this is critical. A digital pH meter must be calibrated with a standard buffer solution (pH 4.0 and pH 7.0) before every testing session. The glass electrode degrades over time and gives drift readings if not maintained. Store the electrode in KCl storage solution (not water) when not in use, clean it with distilled water between readings, and replace the electrode every 1 to 2 years. A poorly maintained meter can give readings that are 0.5 to 1.0 pH units off — enough to cause wrong amendment decisions.